
This is the place to ask about adjusting your Jupiter lens to focus optimally on the Leica. Jupiter-3 and Jupiter-8 can usually be brought into good agreement by setting the Shim of the lens. Setting the lens for close-up/wide-open use normally involves increasing the shim by 0.1mm or so. Some lenses are far off, others are spot-on. Some need the helical moved in the mount to get to work.
I'll be adding some tales from the greasy side to this thread, feel free to post your own or ask questions.
I'll be adding some tales from the greasy side to this thread, feel free to post your own or ask questions.
I'm going to start this thread off with the J-3 job that is more involved than the ones documented elsewhere. This modification is required when the lens will not drive the RF to infinity. The helical is not deep enough into the mount. The solution is to take the helical out of the mount, and grind/polish the mount down little-by-little until Infinity on the focus ring matches infinity on the RF of the camera. I've mostly had to do this with Valdai Jupiter-3's. The Valdai Jupiter-3's are not as good at the earlier lenses. I've shot with 10 of them to get one good one.
This is the good one.


Focus ring off, remove the three set screws.
Set screws have Taps, small holes, to hold in place.
Whoever made this lens drilled through the screw holes of the focus ring and left the metal filings of the taps in the lens. That made focus a little rough. These needed to come out.

The inner and outer parts of the helical are held together with screws that act as guide pins.
Always make scribe marks to mark each side. I use one scribe for the first screw and two scribes for the second. They must go back together the same way as they come apart.
The other "Big Whoops" on this lens: two screw holes for the guide screws. Only time I've ever seen this screw-up. Good think I marked the correct set.

Once the helical is clean and relubed, you need to grind down the lens mount and screw the helical in deeper. This is trial and error, do a little bit at a time. This is the final position for this lens.

Now the hard part. The taps for the set screws of the focus mount need to be redone. Position the focus ring in place, tape it down.

And use a small pick or drill bit to Mark the position on the underlying ring. Do not drill with the focus ring on, you are likely to damage the threads.

I put the helical and mount into a vice, use triple-zero drill bits in a hand drill to start the taps. Then move to a bigger drill bit to finish. Don't go too feep, just deep enough for the set screws.
This is the good one.
Focus ring off, remove the three set screws.
Set screws have Taps, small holes, to hold in place.
Whoever made this lens drilled through the screw holes of the focus ring and left the metal filings of the taps in the lens. That made focus a little rough. These needed to come out.
The inner and outer parts of the helical are held together with screws that act as guide pins.
Always make scribe marks to mark each side. I use one scribe for the first screw and two scribes for the second. They must go back together the same way as they come apart.
The other "Big Whoops" on this lens: two screw holes for the guide screws. Only time I've ever seen this screw-up. Good think I marked the correct set.
Once the helical is clean and relubed, you need to grind down the lens mount and screw the helical in deeper. This is trial and error, do a little bit at a time. This is the final position for this lens.
Now the hard part. The taps for the set screws of the focus mount need to be redone. Position the focus ring in place, tape it down.
And use a small pick or drill bit to Mark the position on the underlying ring. Do not drill with the focus ring on, you are likely to damage the threads.
I put the helical and mount into a vice, use triple-zero drill bits in a hand drill to start the taps. Then move to a bigger drill bit to finish. Don't go too feep, just deep enough for the set screws.
On this lens- I popped all the glass and thoroughly flood cleaned the barrel. I did not take the aperture blades out. I put the barrel in a cup and use 99% isopropyl alcohol to clean.

Steps not shown, covered in other tutorials: re-index the aperture ring and shimming the barrel in the mount.
How the lens looks now:

Close-up and wide-open test,

And distance, all wide-open.

This can be an all day job. I use a Canon III that is matched to my M9 to set the helical in the mount and for a first cut at testing the RF. Remember- no glass in the mount, so it is open to dust and dirt while doing this calibration.
Steps not shown, covered in other tutorials: re-index the aperture ring and shimming the barrel in the mount.
How the lens looks now:
Close-up and wide-open test,
And distance, all wide-open.
This can be an all day job. I use a Canon III that is matched to my M9 to set the helical in the mount and for a first cut at testing the RF. Remember- no glass in the mount, so it is open to dust and dirt while doing this calibration.
Splitting the helical.

Guide Screws keep it together. Mark each side uniquely. Keep the screws in order so you can put them back in the same side they came out of. Some of these screws are different sizes- depending on how well the rail has been cut. They are not all even.


Guide Screws keep it together. Mark each side uniquely. Keep the screws in order so you can put them back in the same side they came out of. Some of these screws are different sizes- depending on how well the rail has been cut. They are not all even.
Helical Apart.


Flood clean, use an ultrasonic cleaner, get the helicles clean...
Flood clean, use an ultrasonic cleaner, get the helicles clean...
My Canon III test camera- for testing the RF.

The Helical had to be driven deeper into the mount on this one as well.
The mount has to be polished down, and don't forget new taps for the set screws that hold the helical in place.


Repositioning the Focus Ring - least favorite part.

The Helical had to be driven deeper into the mount on this one as well.
The mount has to be polished down, and don't forget new taps for the set screws that hold the helical in place.
Repositioning the Focus Ring - least favorite part.

My (not) labor intense way of filling in numbers and markers. I just use a Black Sharpie, fill in everything- then use a dry paper towel, sometimes with a little alcohol, to take the excess off.
It Works.

I am a Hacker. A pro would paint it...
The focus on this lens was rough.

The underside of the focus ring was the problem- and it was brushing up against the mount.
I use 3M Polishing Sheets made for fiber optic connectors and polish down the inside of the focus ring. This is slow, steady, manual effort. It works.

Anyone remember the Hurst-Olds 442?

This lens is fast.
The original Barrel of this lens "just was not right". So I dropped the German Glass into the barrel of a 1950 J-3 that was missing the rear triplet when received. Somebody stuck a random piece of glass in that one to make it look complete.
This has been one of my favorite lenses-

The underside of the focus ring was the problem- and it was brushing up against the mount.
I use 3M Polishing Sheets made for fiber optic connectors and polish down the inside of the focus ring. This is slow, steady, manual effort. It works.
Anyone remember the Hurst-Olds 442?
This lens is fast.
The original Barrel of this lens "just was not right". So I dropped the German Glass into the barrel of a 1950 J-3 that was missing the rear triplet when received. Somebody stuck a random piece of glass in that one to make it look complete.
This has been one of my favorite lenses-
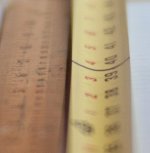
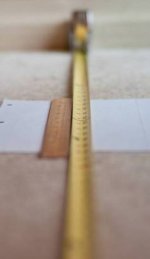
Testing Close focus- tape measure and ruler.
To measure focus error, I use this test target. (no I don't, I use my Fence Post- bit I have it mentally calibrated to 0.01mm shim adjustment. I did this for one lens just to use in the tutorial)

This is after properly shimming the lens.
100% crop on the M9:

Before thickening the shim, focus was about 50mm behind the focus point.
To measure focus error, I use this test target. (no I don't, I use my Fence Post- bit I have it mentally calibrated to 0.01mm shim adjustment. I did this for one lens just to use in the tutorial)
This is after properly shimming the lens.
100% crop on the M9:
Before thickening the shim, focus was about 50mm behind the focus point.
Attachments
My fence post... at F1.5 and min focus...

The ruler is easier to plug numbers into the Excel spreadsheet.
The ruler is easier to plug numbers into the Excel spreadsheet.
hap
Well-known
Testing Close focus- tape measure and ruler.
To measure focus error, I use this test target. (no I don't, I use my Fence Post- bit I have it mentally calibrated to 0.01mm shim adjustment. I did this for one lens just to use in the tutorial)
This is after properly shimming the lens.
100% crop on the M9:
Before thickening the shim, focus was about 50mm behind the focus point.
sorry, did not have my glasses on and couldn't see straight. my bad...39.47 inches.
brusby
Well-known
Very informative material Brian. Thanks for posting.
Are you able to fabricate your own shims? That seems one of the trickiest parts.
Are you able to fabricate your own shims? That seems one of the trickiest parts.
I've made shims from paper, aluminum foil, and braided wire. With the braided wire- can control the thickness by taking out some of the strands. I've done the latter for fixtures that require small shims, like a rear fixture.
brusby
Well-known
I haven't done many, but I've had decent luck with paper and aluminum foil. It's the inside cut that's tricky for me. Good idea about the braided wire. I'd thought about taking a single thicker copper strand, or even lead solder, forming it in a circle and smashing it with a hammer or some kind of press, like an hydraulic jack, to the correct size. But that's not very precise.
Also considering making a mold out of something like plaster of Paris using an existing brass shim and then filling the mold with epoxy and possibly metal powder or filings. Then filing or sanding it down to correct thickness.
Or even a 3d printer??? Would sure be nice to have a machine shop in the back shed.
I've cut metal tubes, the old leg of a tripod, what was about the right diameter.Then polished down using coarse sand paper, fine sand paper, and finally 3M polishing sheets for fiber optics. I've used retaining rings off scrap lenses. It's an issue!
Always use calipers to check the thickness all the way around the shim as you polish.
Always use calipers to check the thickness all the way around the shim as you polish.
Horatio
Masked photographer
Brian, just for clarification, from where are you measuring on the camera to determine the 1 meter distance to subject? Film plane, RF plane or front lens element? I would assume from the film plane.
Thanks,
H
Thanks,
H
From the image plane is "correct". However: the important parameter is knowing the error between the RF and actual focus, and putting that into the equation for focal length. If you are off a few mm in "true" distance, it makes little difference into the change in shim thickness that gets computed using the formula.
This is from the article for adjusting shims:
This is where the formula for focal length gets applied.
1/f= 1/d+1/b, where f is the focal length of the lens, d is distance to the subject, and b is the back-focus to the formed image. In “Excel”; solved for back-focus, it is:
“1/((1/(A2))-(1/(B2*1000)))”
where cell A2 is the focal length of the lens in millimeters, and cell B2 is the distance to the subject in meters.
The RF focused at 1m requires that the back focus of the lens be 55.298mm. The lens was actually at 55.194mm. All of this assumes the lens is 52.4mm in focal length, the
center of the range. So the difference given is a good starting point for adjusting the lens. In this case, thickening the shim by (55.298-55.194), about 0.1mm is suggested.
Trying out "IMGBB" for file and image hosting- uploaded PDF files,

Okay! You can read them here, or download.


This is different, imgbb displays a low-res version of the PDF file.
I have other misc notes that I'll to this thread. But these instructions cover to 95% of cases.
David Hughes
David Hughes
Interesting, thanks.
Even more interesting is the comment about most of them coming from one factory.
Regards, David
Even more interesting is the comment about most of them coming from one factory.
Regards, David
Share:
-
This site uses cookies to help personalise content, tailor your experience and to keep you logged in if you register.
By continuing to use this site, you are consenting to our use of cookies.